前言
前面介紹了如何在有網路的環境底下安裝 Rancher 以及佈署一個 K8S cluster。接下來,這篇文章將會針對如何離線安裝來做說明。其中最需要大家注意的就是 Private registry 的部分。另外,上一篇有些安裝步驟都是需要使用者進到網頁去設置一些東西,包含創建 K8S cluster 的動作。因此,今天這篇也會講述我如何使用 Rancher 以及 K8S 原生的 API 去做設置,就完全不需要登入 UI 去操作了。可以操作 API 的話,自動化安裝當然就會水到渠成,所以自動化安裝即將是下一篇的重點之一,有利於整進 CI/CD 的環境當中。最終的架構會是一個 shell script 串起整個安裝的核心以及操作的工具。好了! 那就開始吧!
準備離線資源
安裝必要套件
既然是屬於 On-premise 的環境要去佈署,代表我們必須要把必要的 packages 打包好才能夠安裝。主機上有些必要的套件需要安裝:
-
Master node:
docker、curl、jq、kubectl -
Worker node:
docker
這邊由於大家所使用的 OS 環境都不全然相同,這邊就不列出以上套件的安裝包了,大家可以自己去抓。像是如果是使用 Centos 的話,你就可以抓取 rpm 包來進行安裝。 kubectl 的安裝方式在 K8S 的官網也都有詳細的說明囉! 安裝也十分簡單 :
1
2
3
curl -LO https://dl.k8s.io/release/v1.20.0/bin/linux/amd64/kubectl
chmod +x kubectl
cp kubectl /usr/local/bin/
安裝完之後,可以查看一下 version
1
kubectl version
就會看到 Client 的 version。Server 的部分無法顯示沒關西,要等到架好 K8S cluster,進行完 config 就可以了。
準備必要 Image
這邊要提及的部分是準備 Docker 的 Images。這些 Images 是安裝 Rancher 以及 K8S 所必備的元件。Rancher 的官方已經很貼心地把必要的 Images 都 list 出來了,還給你了一些 shell 方便你打包,真是棒棒Der ! 連結在這裡,如附圖:
點擊最下面的 Assets 就可以看到囉! 要是你不想用 2.5.5 的版本,一樣的道理就挑選其他 tag 就可以了。
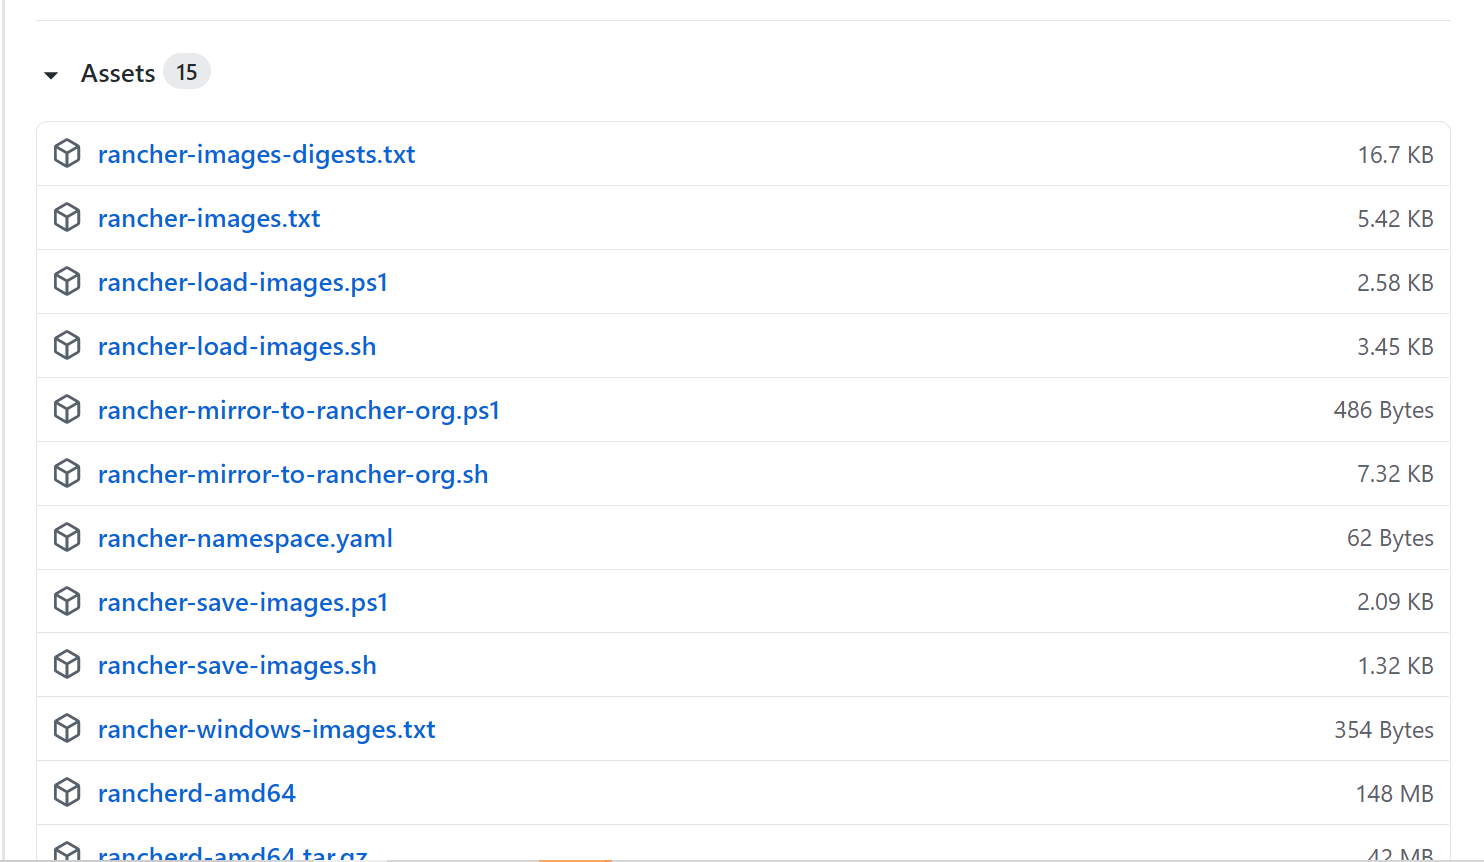
官方文件有教你如何使用上面那些來 Download 並打包這些東西! 找一個有網路的環境也有 docker 的機器 (對公司來說就是 build machine),執行:
1
./rancher-save-images.sh --image-list ./rancher-images.txt
就這麼簡單,在同個 folder 會產生出 rancher-images.tar.gz,這裡面包含了全部 K8S 所需要的套件映像檔。還沒結束,有了這一包之後,我們需要創建一個自己的 registry 來儲存這個包好的 Images。還不熟悉 docker registry的大家可以先去 Docker 官網閱讀一下唷! 前面有說到我們是要準備離線的資源,所以 registry 它自己本身的 Image 也要先打包喔! 我這邊使用的是 registry:2.7 的版本。
1
2
docker pull registry:2.7
docker save -o registry.tar registry:2.7
至此,我們所有需要的離線資源都準備好了,可以進行下一階段。
開始安裝
Deploy registry
首先,我們要佈署好我們的 private registry,先做一下 docker 的 config。將我們等等要使用的 insecure-registries 加進 /etc/docker/daemon.json。假設我們等等要使用的是本機端的 5000 port:
1
2
jq '."insecure-registries" += ["localhost:5000"]' /etc/docker/daemon.json > "tmp" && mv "tmp" daemon.json
cp -f daemon.json /etc/docker/
config 好之後,Reload docker 就可以囉。
1
2
systemctl daemon-reload
systemctl restart docker
那我們先把 registry 帶起來:
1
2
docker load -i registry.tar
docker run -d -p 5000:5000 --restart=always --name registry registry:2.7
完成之後,接著就是要把我們打包好的 Rancher Images 全部 push 到 registry 當中,一樣利用 Rancher 官網建議的方式:
1
./rancher-load-images.sh --image-list ./rancher-images.txt --images ./rancher-images.tar.gz  --registry localhost:5000
這邊可能會花一點時間,因為它會將所有的 Image 先 load 出來之後再去 re-tag 每個 Image,最後 push 至 registry 裡面。完成之後,我們多做一個動作把 load 出來的 Image 砍掉,確保等一下他都是從 registry 裡面拉出來,否則你 local 有了它就不會去找 registry 裡面的了。
1
docker rmi -f $(docker images -q)
查看一下,應該只會看到 registry 他自己本身的 image,不會存在其他的。
1
docker images
Deploy Rancher Server
佈署完 registry 之後,就進入重頭戲囉。跟前一篇文章提到的作法差不多,我們先安裝 Rancher 的 Server,唯一不一樣就是它需要從 registry 裡面拉出來:
1
docker run -d --restart=unless-stopped  --privileged  -p 8080:80 -p 8443:443 localhost:5000/rancher/rancher:v2.5.5
等待他跑起來之後,接下來一連串就是去使用 Rancher 的 API 去做事情囉。
1
2
3
4
LOGINRESPONSE=`curl -s 'https://localhost:8443/v3-public/localProviders/local?action=login' -H 'content-type: application/json' --data-binary '{"username":"admin","password":"admin"}' --insecure`
LOGINTOKEN=`echo $LOGINRESPONSE | jq -r .token`
# Change password
curl -s 'https://localhost:8443/v3/users?action=changepassword' -H 'content-type: application/json' -H "Authorization: Bearer $LOGINTOKEN" --data-binary '{"currentPassword":"admin","newPassword":"'$rancher_admin_password'"}' --insecure
做到這邊,就是前一篇文章設置完密碼的階段。$rancher_admin_password 記得要替換成你要的密碼字串喔! 接著我們往下做:
1
2
3
4
5
6
# Create API key
APIRESPONSE=`curl -s 'https://localhost:8443'/v3/token' -H 'content-type: application/json' -H "Authorization: Bearer $LOGINTOKEN" --data-binary '{"type":"token","description":"Just for testing"}' --insecure`
# Extract and store token
APITOKEN=`echo $APIRESPONSE | jq -r .token`
# Set server-url
curl -s 'https://localhost:8443/v3/settings/server-url' -H 'content-type: application/json' -H "Authorization: Bearer $APITOKEN" -X PUT --data-binary '{"name":"server-url","value":"https://localhost:8443"}' --insecure > /dev/null
做到這邊,就是設置完 Server URL 的階段。這時候你可以登進 UI 查看一下,至此,Rancher server 的部分就完成囉。讀者可以跟前一篇文章交叉比對目前的步驟。
Deploy a K8S cluster
接下來,我們就要來創建我們 K8S 的 cluster 囉! 這邊我附上一個 json 範例,用於創建 cluster 的時候的參數設定。
cluster-sample.json
1
2
3
4
5
6
7
8
9
10
11
12
13
14
15
16
17
18
19
20
21
22
23
24
25
26
27
28
29
30
31
32
33
34
35
36
37
38
39
40
41
42
43
44
45
46
47
48
49
50
51
52
53
54
55
56
57
58
59
60
61
62
63
64
65
66
67
68
69
70
71
72
73
74
75
76
77
78
79
80
81
82
83
84
85
86
87
88
89
90
91
92
93
94
95
96
97
98
99
100
101
102
103
104
105
106
107
108
109
110
111
112
113
{
    "dockerRootDir": "/var/lib/docker",
    "enableClusterAlerting": false,
    "enableClusterMonitoring": false,
    "enableNetworkPolicy": false,
    "windowsPreferedCluster": false,
    "type": "cluster",
    "name": "k8s-demo",
    "rancherKubernetesEngineConfig": {
      "addonJobTimeout": 45,
      "ignoreDockerVersion": true,
      "rotateEncryptionKey": false,
      "sshAgentAuth": false,
      "type": "rancherKubernetesEngineConfig",
      "kubernetesVersion": "v1.19.6-rancher1-1",
      "authentication": {
        "strategy": "x509",
        "type": "authnConfig"
      },
      "dns": {
        "type": "dnsConfig",
        "nodelocal": {
          "type": "nodelocal",
          "ip_address": "",
          "node_selector": null,
          "update_strategy": {}
        }
      },
      "network": {
        "mtu": 0,
        "plugin": "flannel",
        "type": "networkConfig",
        "options": {
          "flannel_backend_type": "vxlan"
        }
      },
      "ingress": {
        "defaultBackend": false,
        "httpPort": 0,
        "httpsPort": 0,
        "provider": "nginx",
        "type": "ingressConfig"
      },
      "monitoring": {
        "provider": "metrics-server",
        "replicas": 1,
        "type": "monitoringConfig"
      },
      "services": {
        "type": "rkeConfigServices",
        "kubeApi": {
          "alwaysPullImages": false,
          "podSecurityPolicy": false,
          "serviceNodePortRange": "30000-32767",
          "type": "kubeAPIService",
          "secretsEncryptionConfig": {
            "enabled": false,
            "type": "secretsEncryptionConfig"
          }
        },
        "etcd": {
          "creation": "12h",
          "extraArgs": {
            "heartbeat-interval": 500,
            "election-timeout": 5000
          },
          "gid": 0,
          "retention": "72h",
          "snapshot": false,
          "uid": 0,
          "type": "etcdService",
          "backupConfig": {
            "enabled": true,
            "intervalHours": 12,
            "retention": 6,
            "safeTimestamp": false,
            "type": "backupConfig"
          }
        }
      },
      "upgradeStrategy": {
        "maxUnavailableControlplane": "1",
        "maxUnavailableWorker": "10%",
        "drain": "false",
        "nodeDrainInput": {
          "deleteLocalData": false,
          "force": false,
          "gracePeriod": -1,
          "ignoreDaemonSets": true,
          "timeout": 120,
          "type": "nodeDrainInput"
        },
        "maxUnavailableUnit": "percentage"
      },
      "privateRegistries": [
        {
          "isDefault": true,
          "type": "privateRegistry",
          "url": "localhost:5000"
        }
      ]
    },
    "localClusterAuthEndpoint": {
      "enabled": true,
      "type": "localClusterAuthEndpoint"
    },
    "labels": {},
    "scheduledClusterScan": {
      "enabled": false,
      "scheduleConfig": null,
      "scanConfig": null
    }
  }
這個 json 就是我們前篇文章在創建 cluster 的時候,在 UI 選擇很多有的沒的設定,這邊都寫在這個 json 檔裡面 (注意: Rancher 的版本日新月異,這個 json 範例是筆者自己產生出來的,符合 Rancher v2.5.5 的版本,若是其他版本不一定適用) 。 記得要改一些參數設定,像是 cluster 名稱、K8S version 以及你想使用的 CNI plugin。還有最重要的 registry 的設定: rancherKubernetesEngineConfig.privateRegistries 這個欄位,設置成你剛剛佈署好的 registry,以我剛剛上面的例子就是 localhost:5000。
再來就是利用這個 json 檔來創建 cluster,底下 command 有些參數(e.g. $APITOKEN)在上面已經有了 :
1
2
3
4
5
6
7
8
9
10
11
12
13
14
# Create cluster
CLUSTERRESPONSE=`curl -s 'https://localhost:8443/v3/cluster' -H 'content-type: application/json' -H "Authorization: Bearer $APITOKEN" --data @cluster.json --insecure`
# Extract clusterid to use for generating the docker run command
CLUSTERID=`echo $CLUSTERRESPONSE | jq -r .id`
# Create token
curl -s 'https://localhost:8443/v3/clusterregistrationtoken' -H 'content-type: application/json' -H "Authorization: Bearer $APITOKEN" --data-binary '{"type":"clusterRegistrationToken","clusterId":"'$CLUSTERID'"}' --insecure > /dev/null
# Set role flags
ROLEFLAGS="--etcd --controlplane --worker"
# Generate nodecommand
AGENTCMD=`curl -s 'https://localhost:8443/v3/clusterregistrationtoken?id="'$CLUSTERID'"' -H 'content-type: application/json' -H "Authorization: Bearer $APITOKEN" --insecure | jq -r '.data[].nodeCommand' | head -1`
# Concat commands
DOCKERRUNCMD="$AGENTCMD $ROLEFLAGS"
# Echo command
echo $DOCKERRUNCMD
把最後的 $DOCKERRUNCMD copy 到 host 上面執行就可以囉! 我這邊範例是包含etcd、controlplane 以及 worker。等待一下子,登進 UI 查看就可以看到你剛剛創建的 cluster 了喔! (想看圖可以參考前一篇的文章)。
Config for kubectl
安裝完 K8S cluster 之後,為了可以使用 kubectl 在 host 上面,要進行一些 config。首先我們要取得目前這個 cluster 的 config,再放到 ~/.kube/config 就可以囉!
1
2
mkdir -p ~/.kube
curl -s -k -X POST -H 'Accept: application/json' -H 'Content-Type: application/json' -H 'Authorization:Bearer '$APITOKEN'' 'https://localhost:8443/v3/clusters/'$CLUSTERID'?action=generateKubeconfig' | jq -r .config > ~/.kube/config
筆者這邊 command 都是已經切換到 root 的帳號才執行唷! 若讀者不是的話要注意有沒有權限問題。或是 kubectl 可能因為帳號不同所以 ~/.kube/config 沒有吃到要注意。最後我們可以檢查:
1
2
3
4
kubectl get nodes

NAME     STATUS   ROLES                      AGE    VERSION
master   Ready    controlplane,etcd,worker   126m   v1.19.6
有看到節點資訊了! OKAY! kubectl 的 command 也都能夠使用囉!
總結
不知道讀者到這邊有沒有充分理解整個步驟呢 ? 我相信一定沒有吧 XD,對任何步驟有問題都可以再寄信問我,非常歡迎。下一篇文章的重點就會是我把上面這些繁瑣的動作都包起來,形成一個 shell script。只要一行 command 加上一些參數就可以一鍵安裝到好,並會附帶一些功能讓使用者方便使用,像是一鍵安裝 registry,取得添加 worker node 的 command 等等的功能。另外,我也會分享很多我跌進去又爬出來的坑 XD。洋洋灑灑的 Rancher 之旅,在下一篇文章應該就會結束囉!
Contact me
有任何疑問或是建議歡迎聯絡 Jimmy!
Gmail: jimmyw86878@gmail.com
Reference
https://gist.github.com/superseb/c363247c879e96c982495daea1125276
-
Previous
Rancher with K8S cluster 之旅 (2) - Install Rancher and deploy a K8S cluster via Internet -
Next
Rancher with K8S cluster 之旅 (4) - OneTouchDeployRancher